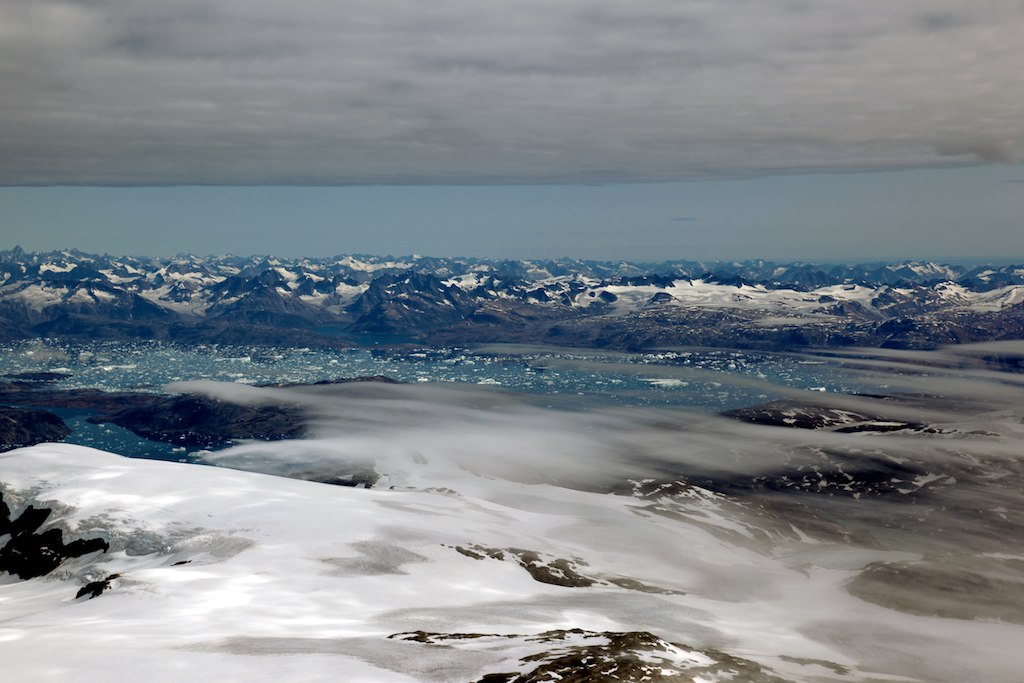
A 1:1 crop of a frame grab from this workflow. The water illustrates that there is no colored aliasing unlike on a BMCC ProRes version of the same scene would, this version is clean!
First I experiemented with open source raw converter called dcraw. However, I found in my testing that it is useless, because it scales the luminosity values in such way that it clips from both darks and lights, it is about impossible, no matter what parameters are set, to get a non-clipping flat image out of the dcraw converter - even if you succeed to create a flat image, it still has darks and lights clipped and dynamic range gets reduced by significant amount (and the biggest benefits of the BMCC are not realized.
Then I realized that it is possible to grade the dngs directly using Apple's Aperture. However, it turned out that it also clips darks and highlights. Moving the exposure slider has different effect than using +1 or +2 stops from the menu. And there was a choice to clip either the darks or clip the highlights by using the +1, +2 or -1 or -2 from the menu. No matter how the highlights, shadows and curves are dialed in, the image is clipped from either end to completely black or completely white despite it was not clipping as RAW at all.
I then discovered the libraw. THe libraw promises that it fixes dcraw's faults and according to my testing, it does do that. The dcraw's faults are not bugs, but features that the creator of dcraw insists according to what I read about it on the libraw page. Therefore libraw was found to be a potential solution. Libraw promises that it does not scale the luminosity and it indeed does not.
I compiled libraw for Mac and got it done, after lots of fight with the crappy automake system (thanks to Kate Alhola for sorting it out) that makes it much harder to compile than the libraw that compiles with one command and requires no dependencies, dcraw wins in this detail.
I have done a lot of testing to perfect the parameters in the libraw dcraw_emu to make the resulting tiff images to retain the maximal dynamic range that I could then grade in Aperture.
I created a following bash script for automating the libraw use:
dngconvert
echo "Dng converter that uses libraw"

echo "By Karoliina Salminen & Kate Alhola"

echo "Converting all files in a directory to tiff"

echo ""

mkdir dngs

for i in ./*.dng

do

        echo "Task $i"

        /usr/bin/dcraw_emu -4 -T -H 1 -g 2.7 0 -m 19 -n 0 -o 0 -b 1.5 $i &

        echo "Sleeping before next task"

        echo ""

        sleep 3

done

mv *.dng dngs/

mkdir graded

echo "All done."

echo ""
Set execute bit on, chmod a+x dngconvert. I have copied this to /usr/bin to be able to run it from the terminal (as /usr/bin is by default in the path). The usage goes that I go to a folder where my Blackmagic Cinema Camera RAW footage is (the dng frames). I type:
dngconvert
And as a result all my dngs get converted to flat tiffs.
Now when this step is done, I start Aperture and import all the tiffs to Aperture project. I grade one image of the batch using the Aperture adjustments normally. When I am satisfied with the grade, I save it as a Effect - select Effect - Save as Effect. I give the name of the scene as effect name. You can delete these later when you no longer need them. Then I select the image thumbnail mode. From that I select the list view mode. I click the first image, scroll down to the last image, and by holding also shift key, I click the last image. All images get selected this way. Now I go to menu Photos - Add Effect - and then I select my effect. Such as Scene546. Then wait that the effect gets applied to all images and all images are successfully now looking the same.
After verifying that all images are now correctly grade in the thumbnail view. Select all images and select File - Export Versions - TIFF Original Size 16 bit. Now export the graded versions to the folder that got greated under your scene folder, e.g. BMCC_1_2013-11-06_0544_C0002/graded. Use the original version names (important, otherwise your images end up in wrong order in the next step). Wait export to be complete.
Now you have to join the tiff images together to make a movie. I use ffmpeg for the task. You can find an already compiled ffmpeg from the net. Or you can compile your own if you are adventurous. I have a script called proresencode placed in /usr/bin folder and it contains the following line:
ffmpeg -f image2 -pattern_type glob -i '*.tiff' -r 25 -vcodec prores -profile:v 2 -an $1
Now when you have this created and chmod a+x proresencode done, and the file is copied to /usr/bin (sudo cp proresencode /usr/bin/), I can go to the graded folder and type just proresencode myscene.mov. And a movie file called myscene.mov is created based on the tiff sequence in this folder. Now you have 2432x1366 pixel size ProRes file.
Now you have the next problem, Final Cut Pro X has custom resolution crippled in such a way that you can't use custom resolution with custom resolution choice. You can't edit your footage and or it gets scaled down to HD. What you can do next is that you instead of the flawed FCPX, import these to Motion instead.
Create new Motion project at resolution 2432x1366, 25 fps (or as many fps you have in your footage, depending the choice in the BMCC). You can do the same basic editing tasks in Motion despite it is not really meant for that. But it works. You can now join your clips together and join also your potentially serarately recorded audio. You can use your audio track from the folder (the wav file) as reference to align your separately recorded audio (e.g. if you have Zoom H4n or similar audio recorder to accompany your Blackmagic Cinema Camera).
Now export your movie from Motion (under Share-menu). Use the option "Same as Source". And now your graded movie gets exported and it is full 2432x1366 resolution Blackmagic Cinema Camera movie with no or very little aliasing and with the full dynamic range retained and the Resolve step is avoided and also is avoided buying new software eg. Adobe Lightroom if you don't have it already. And also the libraw does with the settings above, less aliasing than the Adobe, your footage will be very clean. And it will have about zero colored aliasing. The BMCC footage now looks like it should look like - ultradetailed and with very high dynamic range. It was quite a bit of work to do that, but this workflow works for me.
According to my testing this produces much cleaner images for green screen compositing than the other options, including Resolve. libraw debayer with above settings produces extra clean image. It may not be as sharp as the sharpest I can get from Phase One debayer, but it is a tradeoff - aliasing or extra sharp. I tried to make the resulting images photographically real with my setting above. To my eye results are quite pleasing.
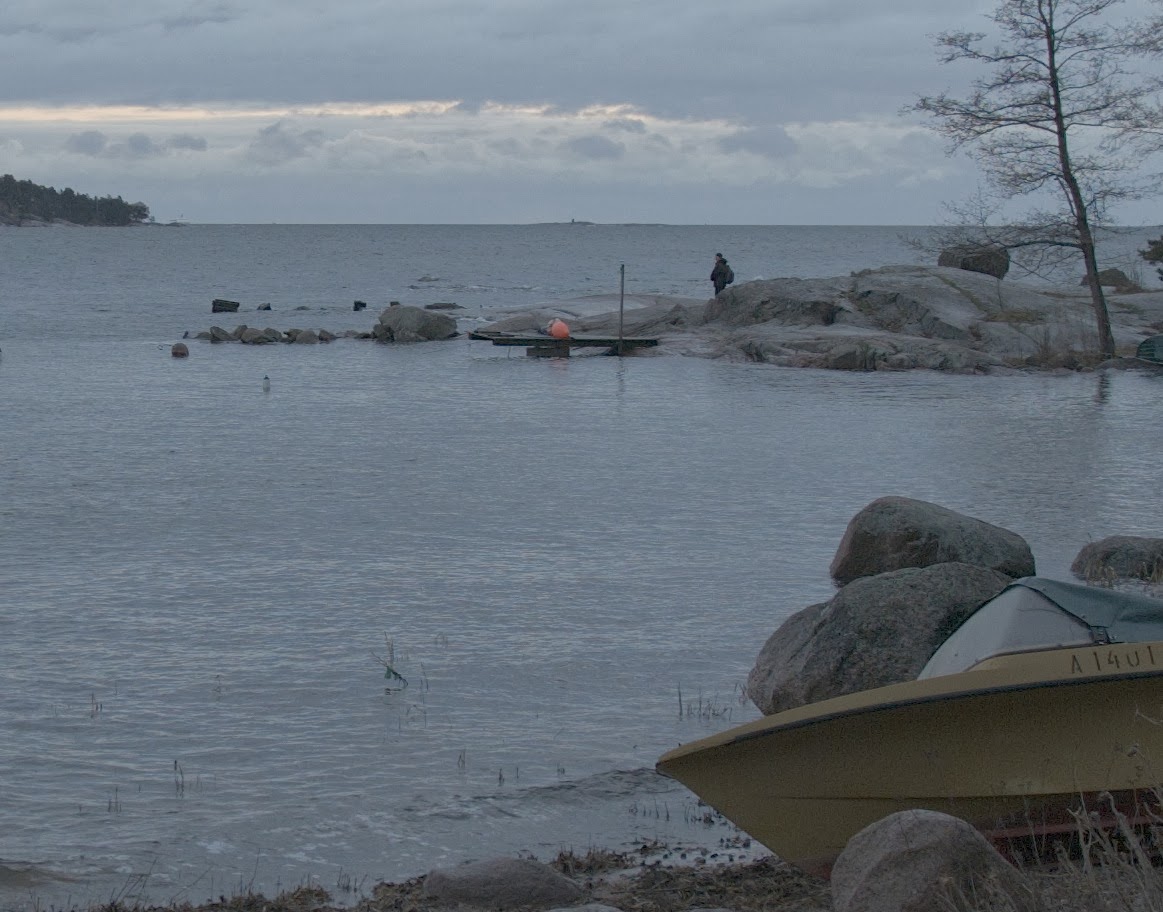
One example frame: KaroliinaJaKateBMCC_1_2013-11-06_0546_C0004_000089.dng.tiff